Suspension Types: There are three basic types of shocks currently available on production quads.
Standard Non-Adjustable Shocks: These shocks are found on smaller, more cost-efficient quads such as youth quads. As the name suggests, they do not have any adjustability and rely heavily on the spring to produce suspension action (to soak up the bumps and jumps).
Pre-load Adjustable Shocks: These shocks are usually found on entry-level sport quads as well as most sport/utility quads. Preload adjustable suspensions have two types: the first generally uses five pre-determined preload settings, while the other uses a threaded lock ring mechanism. Both types work on the same principle to adjust suspension action.
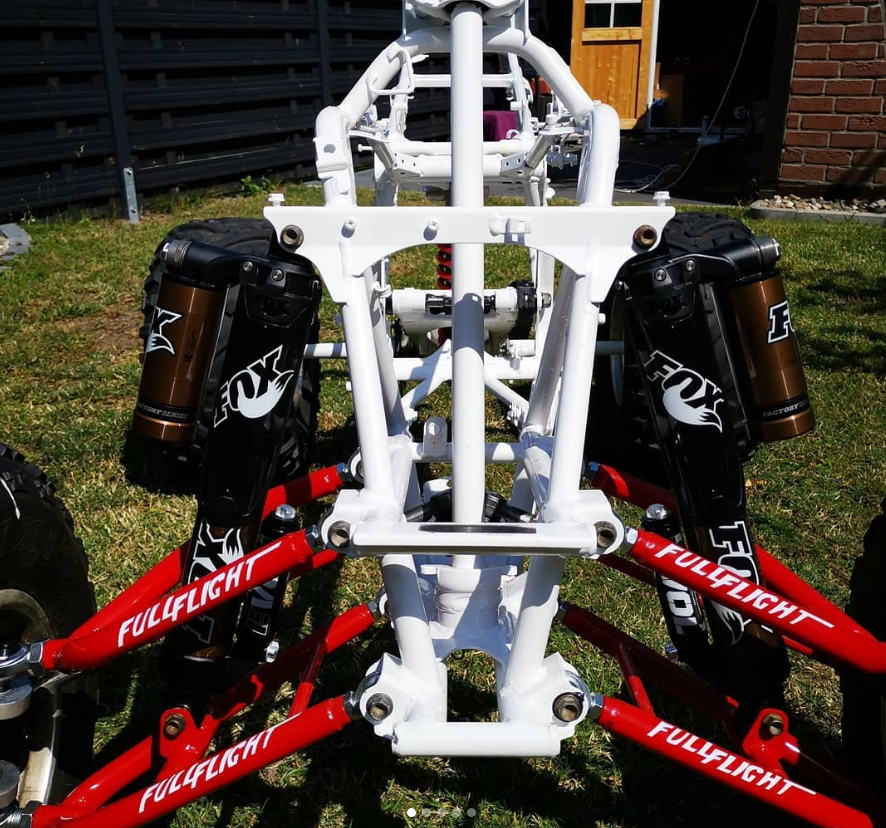
Fully Adjustable Piggyback Reservoir: The most advanced form of stock suspension is the fully adjustable piggyback shock. This type of shock is found on the newest batch of sport quads and features compression, rebound, and threaded preload adjustments that allow a rider to completely customize the suspension ride quality of their machine.
Setting Up Your Suspension: Now that you know the different types of suspension, figure out what kind of setup your quad is equipped with. Got it? Good. Now take some measurements to see how you can best adjust your quad’s suspension.
Metric vs. American (aka standard): When measuring percentages of suspension travel, it is generally easier to work with a metric tape measure. Metric measurement allows for quicker conversions from percentages to actual measured numbers. For example, to find 10% of 9 5/8” of travel, the 5/8” must be converted into a decimal value of (0.625), and then the total value must be multiplied by 0.10 (ie. 9.625 x 0.10 = 0.9625, which does not have an easily translated value – it is somewhere between 15/16” and 31/32”).
If you use metric measurements the math can almost be done in your head (ie. 560 cm x 0.10 = 56 cm). So the idea of having a metric tape measure for suspension measurements is definitely a good idea and much easier on your brain.
See our ELKA Shocks
Camber: Camber is the amount of degrees that the tire and wheel is tilted in or out at the top in relation to the bottom of the tire. A tire that is tilted in at the top and out at the bottom is said to have negative camber.
The farther it angles out at the bottom the greater the amount of negative camber. For positive camber, the top of the tire is farther out than the bottom. The reason for having camber in your front end is as follows. An ATV’s suspension is forced over in a corner and the suspension flexes. With everything in motion, all this force wants to flex the tire more upright, or reducing the amount of negative camber. A tires greatest traction is achieved when more of the tread is in contact with the ground. As the bike enters a corner, the forces tend to bend everything over, adding positive camber. To make sure that the tires greatest amount of tread is in full contact when it is most needed, we set up the front suspension with a negative camber. How much negative camber you choose depends on the amount of suspension travel, and some various other factors such as the terrain you plan to ride on.
Caster: Caster is the amount of angle that the spindle has in relation to the vertical centerline of the wheel. If the upper ball joint is farther forward than the lower ball joint, it is said to have negative caster. If the upper ball joint is farther to the back than the lower ball joint, it is said to have positive caster. The greater the amount of positive caster, the more stable the ATV will be at speed. The less positive caster it has, the easier it will steer and the quicker it will turn. As the spindle is laid back, the tire has to lay over more when the front tires are turned. This adds stability. If there is not much angle, the wheel will turn more easily, making it quicker and easier to turn.
Recommended Caster:
Positive Recommended Camber Negative
Motocross: 5 – 7° Motocross: 1 – 3°
Cross Country: 5 – 7° Cross Country: 1 – 3°
Sand Duning: 3 – 5° Sand Duning: 2 – 4°
Desert Racing: 6 – 8° Desert Racing: 2 – 4°
Recreational: 5 – 7° Recreational: 1 – 3°
TT Racing: 3 – 4° TT Racing: 1°
Toe: The toe of an ATV measures the relation of the leading edge of the front tires to the back of the tires. Toe-out refers to the fact that the front of the tires point out. Toe-in refers to the fact that the front of the tires point in. Recommended setting for your toe-in to ¼ of an inch.

How to Setup your Front End: Before you start this procedure, a few things need to be done first. Make sure your workspace floor is completely level. You will need a straight edge and an angle finder (available at your local hardware store). Do not attempt to set up your front end on a stand of any kind. Your quad must have the tires on, and be on the ground at ride height. Make sure that the tires have equal tire pressure from side to side. This is commonly overlooked and can significantly change your measurements.
Setting the Caster: Prior to installing your A-arms, thread the Heim joints in all the way on the upper arms. Leave the front rod end alone and back the rearward rod end out (3) complete revolutions. This is a good starting point.
Now install your A-arms. Tighten them completely. Rest the straight edge against the side edge of the upper and lower ball joint threads. (Make sure the straight edge is touching the same section of the ball joint threads) if the top of the straight edge leans towards the rear of your quad, you have positive caster. This is what you want. Rest the angle finder on the edge of the straight edge. This will tell you the exact caster setting. You may need to adjust the Heim Joints by turning one in or out more than the other to get the appropriate setting. Refer to the above recommendations for how much caster to run.
Setting the Camber: Setting the camber is a much easier process. Rest the straight edge against the outside of your front tire (making sure both wheels are pointing straight and you are touching the same part of the tire, top and bottom). The top of the straight edge should lean inward for negative camber. Now put the angle finder against the straight edge and note the reading. If you need more or less camber, you are going to have to remove one of the ball joints in order to adjust it. First remove the cotter pin and castle nut off of the ball joint, then “smack” the side of the spindle right where the ball joint goes through the spindle to jar the ball joint loose. It will take some pressure to remove it, and it helps if you lift up on the arm itself as your hitting the spindle. For more negative camber, turn the upper ball joint into the a-arm (clockwise). *On most A-arms the upper ball joint will require the jam nut on the outside and the lower ball joint will require the jam nut on the inside of the arm when properly set up.
Toe Adjustment: For this all you will need is a tape measure. Make sure the handlebars are straight, then make sure both tires are pointing straight forward. To do this, measure from the inside of one tire to a point on the chassis. Make a note of the distance. Then on the other side, measure from the exact same points as you did on the previous side. These measurements need to be exactly the same so that you know your tires are pointed the same. Adjust the tie rods so that this measurement is the same. Now that you’re sure the tires are the same distance apart, you need to measure for the toe in. On the front of the tire about half way up, place one end of the tape measure on the inside of the tire and take a measurement from the same point on the other tire. Note this measurement. Then repeat this for the rear of the tire, the same height from the ground as you did on the front, and make a note of this measurement. The front measurement needs to be a ¼ of an inch less than the rear measurement. Adjust the tie rods so that you achieve this measurement. And remember, count how many times you rotate the tie rod, then rotate the other side the same distance, so you can keep the tires going straight ahead, then take your measurements. One full turn on both tie rods will change the toe about 1/8th of an inch.
Finalizing Installation: Make sure to completely tighten all nuts and bolts on your new front end to the manufacturers recommend torque and install your cotter pins. Make sure to add grease to all the pivot points that have grease zerks. Your ball joints come pre-greased and don’t require lubrication at this time. Depending on the areas you ride, you might need to grease them in the future. Always check the boots to make sure they are sealed.
If you notice any mud or rust-colored water coming from the inside of the joint, you probably have a torn boot. The joint needs to be replaced if any foreign object gets into the boot where the grease is as they will wear out extremely quick. Never point a pressure washer directly at the ball joint, as it will force water and any dirt into the joints, therefore significantly shorting their life span. The joints will last a lifetime if they are properly maintained.
ADJUSTING SUSPENSION: Your probably just like most people. You go to your local dealer, pick out your ATV, take it home and ride it. Did you know that you could and should adjust the comfort of that four wheeled beast by adjusting those shocks and thereby giving you a more comforting ride that means you will be LESS fatigued at the end of the day? Tune your Suspension. Don’t know how? Don’t be afraid, we’ll walk you through it step by step. First we’ll teach you a few simple things about ATV shocks.
Get Fullflfight Racing adjustable A-arms
Before you alter your suspension settings, this is another important aspect to consider when dialing in your quad’s suspension – adjusting for proper sag. There are two types of sag that need to be measured and tweaked: free sag and rider sag. The following information pertains to a completely stock setup (we’re not talking about long-travel front ends, only stock setups, etc.) A stock front suspension’ sag does not have a significant effect on ride height, therefore, all measurements should start from the rear end.
Free Sag: This first measurement determines how much free sag your suspension has. Free sag (also called static sag) is the amount of suspension travel that is used when the quad is under its own weight subtracted from the overall suspension travel. Huh? Don’t worry, it sounds more technical and tough than it is. Determining these measurements for the front and rear suspension require two different methods:
Front Suspension: Have a friend lift the front end of the quad until the A-arms are fully extended but the tires are still in contact with the ground. Take a measurement from the floor to a center point on the front of the quad’s frame (mark the point with a marker because you must use that as a point of reference for future measurements). This is called the “unloaded measurement.” Once this measurement has been taken, put the unit back on the ground and bounce the front suspension to let it settle in. Now measure from the ground to the same point on the frame. Subtract the weighted measurement (the second measurement) from the unloaded measurement (the first measurement) to obtain your free sag value. Ideally, the number you get after doing the math should be around 10 percent of your quad’s total suspension travel (example: 1 inch of sag for 10 inches of total suspension travel).
Rear Suspension: To measure the free sag for the rear end, lift at the grab bar until the suspension is unloaded with the tires still touching the ground and take a measurement from the grab bar to a chosen point on the swingarm. Once this measurement is taken, drop the unit back on the ground and bounce the suspension to let it settle.
Now that your quad is back on the ground and under it’s own weight, take a measurement from the same point on the grab bar to the same point on the swingarm. Subtract the loaded suspension value (the second measurement) from the unloaded value (the first measurement); this value should again be as close to 10 percent of the total suspension travel as possible.
NOTE: This method is for quads with a solid rear axle. Make sure that each of these measurements have been recorded on a piece of paper and saved for future reference. And double check your measurements and math!
PRELOAD:
Is when you adjust the length of the shock to match your body weight. The springs that you see on shocks, controls PRELOAD.
COMPRESSION:
Controls how easy or hard it is for the shock to squeeze together when you hit bumps.
REBOUND:
Controls how fast the shock returns to its normal position after it has been compressed. One note here, NOT all shocks on all ATVs have all these adjustments. Please consult you owners manual to determine which adjustments you can make.
PRELOAD ADJUSTMENT:
By turning the large nut at the bottom of the spring you can adjust the springs tension to suit your body weight. To properly make this adjustment you will need to measure the “ride height sag”.
REAR SHOCK:
Lift the rear wheels up off the ground.
With the wheels off the ground, measure the distance from the top center of the rear axle to some point straight above it on the ATVs frame. Write this dimension down.
With all your riding gear on plop your butt on the seat with your feet on the pegs in your normal riding position. Then have someone measure the distance again in the same place as the first measurement.
The difference between the two measurements is called the “ride height sag”.
Adjust your preload so that your “ride height sag” is about 30% for Dirt Bikes and 50% for an ATV of your total suspension travel.
Example: If you have nine(9) inches of total travel you should have about three(3) inches of ride height sag, or four and half inches of ride height sag for an ATV.
FRONT SHOCK:
Use the same procedure EXCEPT your “ride height sag” should be about 20% of your total shock travel.
Measuring with wheels off the ground, Measure again with full riding gear on.
COMPRESSION ADJUSTMENT:
Adjusting the compression of the shock determines how fast the shock “compresses” together.
This adjustment should be made according to the type of riding you plan on doing. The real trick here
is set the suspension at the point where you use all the travel of the shock without bottoming out hard.
With the setting too soft the suspension will feel “mushy” and you feel like it’s “floating”.
With the setting too hard, you will feel every little bump you hit because the shock isn’t absorbing the bumps like it should.
You can start by setting the compression at full soft. Ride the ATV for a short while. Then begin to ride over small bumps. Begin to adjust the shocks to absorb the bumps without feeling mushy. As you adjust the compression on the shocks, gradually begin moving up to bigger bumps and jumps. Every time you progress to larger jumps amd bumps readjust the shocks. Keep doing this until you reach the point where you have reached YOUR personal limit of bumps or jumping safely while using all the travel in the shocks. (It’s even ok if you allow the shocks to bottom out “slightly” as you land your largest jump)
REBOUND:
The rebound adjustment is the setting that determines how fast the shock returns to its normal position.
Setting the rebound at full soft allows the shock to return to full extension more quickly. At this setting the ATV may begin to experience a pogo stick effect. As the rider speeds over bumps, a shock that returns too quickly may rebound right back up and smack you right in the butt, sending you right over the handlebars.
Setting the rebound at full hard slows the return of the shock to it’s normal position. At this setting as a rider speeds over bumps the shocks may not return to position fast enough causing the shocks “pack up”. The more the shocks “pack up” the less travel they have until they have a chance to return to their normal position. The best way to set the rebound on your shocks is to find a set of” whoops”. A series of rolling hills two feet high and six feet apart.
With the setting at full soft, ride through the whoops at a slow pace at first. Then each time you ride through the whoops go through a little faster adjusting the rebound until you reach your fastest comfortable speed and the ATV is returning to its correct position without bucking you off.
IT ISN’T BRAIN SURGERY
The MOST important thing to remember is, ONLY MAKE ONE CHANGE AT A TIME! Doing one change at a time will allow you to get a better feel for how your suspension is responding to the changes. Making more than one change at a time will just confuse you because you won’t know which change made a desired or undesired effect. Tuning in your suspension to suit your needs will make you a much happier rider as well as a much more confident and competitive, rider.
CITE: http://myatvblog.com/how-to/atv-suspension-unleashed-easy-guide-precisely-setting-suspension/


Leave a comment